Important
This documentation covers IPython versions 6.0 and higher. Beginning with version 6.0, IPython stopped supporting compatibility with Python versions lower than 3.3 including all versions of Python 2.7.
If you are looking for an IPython version compatible with Python 2.7, please use the IPython 5.x LTS release and refer to its documentation (LTS is the long term support release).
IPython Sphinx Directive
Note
The IPython Sphinx Directive is in ‘beta’ and currently under active development. Improvements to the code or documentation are welcome!
The ipython directive is a stateful ipython shell for embedding in
sphinx documents. It knows about standard ipython prompts, and
extracts the input and output lines. These prompts will be renumbered
starting at 1. The inputs will be fed to an embedded ipython
interpreter and the outputs from that interpreter will be inserted as
well. For example, code blocks like the following:
.. ipython::

   In [136]: x = 2

   In [137]: x**3
   Out[137]: 8
will be rendered as
In [1]: x = 2

In [2]: x**3
Out[2]: 8
Note
This tutorial should be read side-by-side with the Sphinx source for this document because otherwise you will see only the rendered output and not the code that generated it. Excepting the example above, we will not in general be showing the literal ReST in this document that generates the rendered output.
Persisting the Python session across IPython directive blocks
The state from previous sessions is stored, and standard error is trapped. At doc build time, ipython’s output and std err will be inserted, and prompts will be renumbered. So the prompt below should be renumbered in the rendered docs, and pick up where the block above left off.
In [3]: z = x*3   # x is recalled from previous block

In [4]: z
Out[4]: 6

In [5]: print(z)
6

In [6]: q = z[)   # this is a syntax error -- we trap ipy exceptions
------------------------------------------------------------
   File "<ipython console>", line 1
     q = z[)   # this is a syntax error -- we trap ipy exceptions
           ^
SyntaxError: invalid syntax
Adding documentation tests to your IPython directive
The embedded interpreter supports some limited markup. For example, you can put comments in your ipython sessions, which are reported verbatim. There are some handy “pseudo-decorators” that let you doctest the output. The inputs are fed to an embedded ipython session and the outputs from the ipython session are inserted into your doc. If the output in your doc and in the ipython session don’t match on a doctest assertion, an error will occur.
In [7]: x = 'hello world'

# this will raise an error if the ipython output is different
In [8]: x.upper()
Out[8]: 'HELLO WORLD'

# some readline features cannot be supported, so we allow
# "verbatim" blocks, which are dumped in verbatim except prompts
# are continuously numbered
In [9]: x.st<TAB>
x.startswith  x.strip
For more information on @doctest decorator, please refer to the end of this page in Pseudo-Decorators section.
Multi-line input
Multi-line input is supported.
In [10]: url = 'http://ichart.finance.yahoo.com/table.csv?s=CROX\
   ....: &d=9&e=22&f=2009&g=d&a=1&br=8&c=2006&ignore=.csv'
   ....:

In [11]: print(url.split('&'))
['http://ichart.finance.yahoo.com/table.csv?s=CROX', 'd=9', 'e=22',
Testing directive outputs
The IPython Sphinx Directive makes it possible to test the outputs that you provide with your code. To do this, decorate the contents in your directive block with one of the following:
- list directives here
If an IPython doctest decorator is found, it will take these steps when your documentation is built:
1. Run the input lines in your IPython directive block against the current Python kernel (remember that the session persists across IPython directive blocks);
2. Compare the output of this with the output text that you’ve put in the IPython directive block 9what comes
after Out[NN]);
- If there is a difference, the directive will raise an error and your documentation build will fial.
You can do doctesting on multi-line output as well. Just be careful when using non-deterministic inputs like random numbers in the ipython directive, because your inputs are run through a live interpreter, so if you are doctesting random output you will get an error. Here we “seed” the random number generator for deterministic output, and we suppress the seed line so it doesn’t show up in the rendered output
In [12]: import numpy.random

In [13]: numpy.random.rand(10,2)
Out[13]:
array([[0.64524308, 0.59943846],
       [0.47102322, 0.8715456 ],
       [0.29370834, 0.74776844],
       [0.99539577, 0.1313423 ],
       [0.16250302, 0.21103583],
       [0.81626524, 0.1312433 ],
       [0.67338089, 0.72302393],
       [0.7566368 , 0.07033696],
       [0.22591016, 0.77731835],
       [0.0072729 , 0.34273127]])
For more information on @supress and @doctest decorators, please refer to the end of this file in Pseudo-Decorators section.
Another demonstration of multi-line input and output
In [14]: print(x)
jdh

In [15]: for i in range(10):
   ....:     print(i)
   ....:
   ....:
0
1
2
3
4
5
6
7
8
9
Most of the “pseudo-decorators” can be used an options to ipython
mode. For example, to setup matplotlib pylab but suppress the output,
you can do. When using the matplotlib use directive, it should
occur before any import of pylab. This will not show up in the
rendered docs, but the commands will be executed in the embedded
interpreter and subsequent line numbers will be incremented to reflect
the inputs:
.. ipython::
   :suppress:

   In [144]: from matplotlib.pylab import *

   In [145]: ion()
Likewise, you can set :doctest: or :verbatim: to apply these
settings to the entire block. For example,
In [16]: cd mpl/examples/
/home/jdhunter/mpl/examples

In [17]: pwd
Out[17]: '/home/jdhunter/mpl/examples'

In [18]: cd mpl/examples/<TAB>
mpl/examples/animation/        mpl/examples/misc/
mpl/examples/api/              mpl/examples/mplot3d/
mpl/examples/axes_grid/        mpl/examples/pylab_examples/
mpl/examples/event_handling/   mpl/examples/widgets

In [19]: cd mpl/examples/widgets/
/home/msierig/mpl/examples/widgets

In [20]: !wc *
    2    12    77 README.txt
   40    97   884 buttons.py
   26    90   712 check_buttons.py
   19    52   416 cursor.py
  180   404  4882 menu.py
   16    45   337 multicursor.py
   36   106   916 radio_buttons.py
   48   226  2082 rectangle_selector.py
   43   118  1063 slider_demo.py
   40   124  1088 span_selector.py
  450  1274 12457 total
You can create one or more pyplot plots and insert them with the
@savefig decorator.
For more information on @savefig decorator, please refer to the end of this page in Pseudo-Decorators section.
In [21]: plot([1,2,3]);
# use a semicolon to suppress the output
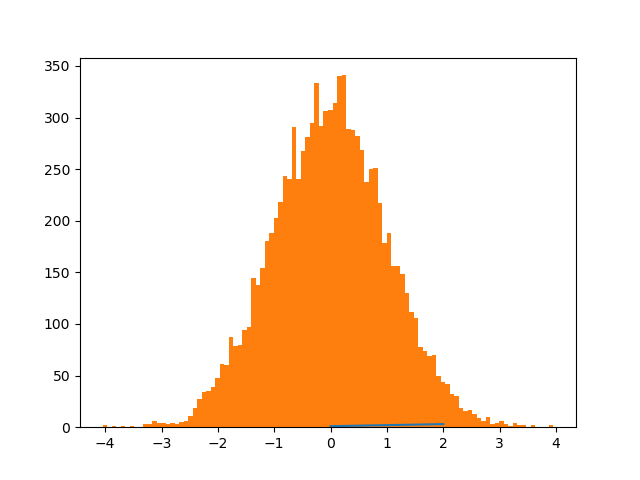
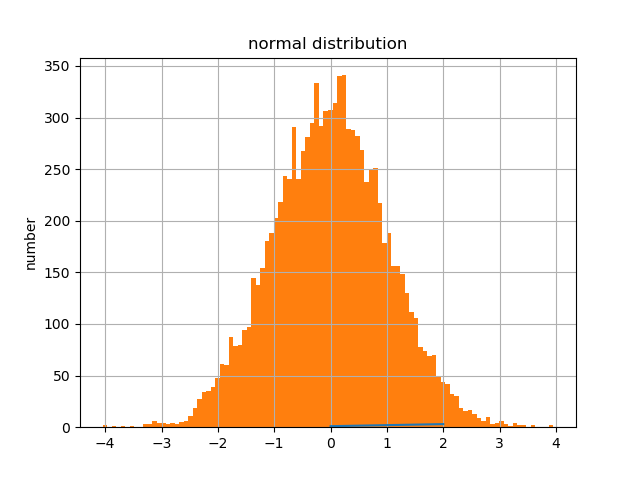
In [22]: hist(np.random.randn(10000), 100);

In a subsequent session, we can update the current figure with some text, and then resave
In [23]: ylabel('number')
Out[23]: Text(38.222222222222214, 0.5, 'number')
In [24]: title('normal distribution')
�������������������������������������������������Out[24]: Text(0.5, 1.0, 'normal distribution')
In [25]: grid(True)
You can also have function definitions included in the source.
In [26]: def square(x):
   ....:     """
   ....:     An overcomplicated square function as an example.
   ....:     """
   ....:     if x < 0:
   ....:         x = abs(x)
   ....:     y = x * x
   ....:     return y
   ....:
Then call it from a subsequent section.
In [27]: square(3)
Out[27]: 9
In [28]: square(-2)
�����������Out[28]: 4
Writing Pure Python Code
Pure python code is supported by the optional argument python. In this pure
python syntax you do not include the output from the python interpreter. The
following markup:
.. ipython:: python

   foo = 'bar'
   print(foo)
   foo = 2
   foo**2
Renders as
In [29]: foo = 'bar'

In [30]: print(foo)
bar

In [31]: foo = 2

In [32]: foo**2
Out[32]: 4
We can even plot from python, using the savefig decorator, as well as, suppress output with a semicolon
In [33]: plot([1,2,3]);

For more information on @savefig decorator, please refer to the end of this page in Pseudo-Decorators section.
Similarly, std err is inserted
In [34]: foo = 'bar'
In [35]: foo[)
[0;36m File [0;32m"<ipython-input-35-edde7a2425af>"[0;36m, line [0;32m1[0m
[0;31m foo[)[0m
[0m ^[0m
[0;31mSyntaxError[0m[0;31m:[0m invalid syntax
Handling Comments
Comments are handled and state is preserved
# comments are handled
In [36]: print(foo)
bar
If you don’t see the next code block then the options work.
Splitting Python statements across lines
Multi-line input is handled.
In [37]: line = 'Multi\
   ....:         line &\
   ....:         support &\
   ....:         works'
   ....:

In [38]: print(line.split('&'))
['Multi        line ', '        support ', '        works']
Functions definitions are correctly parsed
In [39]: def square(x):
   ....:     """
   ....:     An overcomplicated square function as an example.
   ....:     """
   ....:     if x < 0:
   ....:         x = abs(x)
   ....:     y = x * x
   ....:     return y
   ....:
And persist across sessions
In [40]: print(square(3))
9
In [41]: print(square(-2))
��4
Pretty much anything you can do with the ipython code, you can do with with a simple python script. Obviously, though it doesn’t make sense to use the doctest option.
Pseudo-Decorators
Here are the supported decorators, and any optional arguments they
take. Some of the decorators can be used as options to the entire
block (eg verbatim and suppress), and some only apply to the
line just below them (eg savefig).
@suppress
execute the ipython input block, but suppress the input and output block from the rendered output. Also, can be applied to the entire.. ipythonblock as a directive option with:suppress:.
@verbatim
insert the input and output block in verbatim, but auto-increment the line numbers. Internally, the interpreter will be fed an empty string, so it is a no-op that keeps line numbering consistent. Also, can be applied to the entire.. ipythonblock as a directive option with:verbatim:.
@savefig OUTFILE [IMAGE_OPTIONS]
save the figure to the static directory and insert it into the document, possibly binding it into a minipage and/or putting code/figure label/references to associate the code and the figure. Takes args to pass to the image directive (scale, width, etc can be kwargs); see image options for details.
@doctest
Compare the pasted in output in the ipython block with the output generated at doc build time, and raise errors if they don’t match. Also, can be applied to the entire.. ipythonblock as a directive option with:doctest:.
Configuration Options
ipython_savefig_dir
The directory in which to save the figures. This is relative to the Sphinx source directory. The default ishtml_static_path.
ipython_rgxin
The compiled regular expression to denote the start of IPython input lines. The default isre.compile('In [(d+)]:s?(.*)s*'). You shouldn’t need to change this.
ipython_rgxout
The compiled regular expression to denote the start of IPython output lines. The default isre.compile('Out[(d+)]:s?(.*)s*'). You shouldn’t need to change this.
ipython_promptin
The string to represent the IPython input prompt in the generated ReST. The default is'In [%d]:'. This expects that the line numbers are used in the prompt.
ipython_promptout
The string to represent the IPython prompt in the generated ReST. The default is'Out [%d]:'. This expects that the line numbers are used in the prompt.
Automatically generated documentation
Sphinx directive to support embedded IPython code.
IPython provides an extension for Sphinx to highlight and run code.
This directive allows pasting of entire interactive IPython sessions, prompts and all, and their code will actually get re-executed at doc build time, with all prompts renumbered sequentially. It also allows you to input code as a pure python input by giving the argument python to the directive. The output looks like an interactive ipython section.
Here is an example of how the IPython directive can run python code, at build time.
In [1]: 1+1
Out[1]: 2
In [2]: import datetime
...: datetime.datetime.now()
...:
����������Out[2]: datetime.datetime(2018, 12, 10, 23, 25, 11, 793672)
It supports IPython construct that plain Python does not understand (like magics):
In [3]: import time

In [4]: %timeit time.sleep(0.05)
50.1 ms +- 11.6 us per loop (mean +- std. dev. of 7 runs, 10 loops each)
This will also support top-level async when using IPython 7.0+
In [5]: import asyncio
   ...: print('before')
   ...: await asyncio.sleep(1)
   ...: print('after')
   ...:
before
after
The namespace will persist across multiple code chucks, Let’s define a variable:
In [6]: who = "World"
And now say hello:
In [7]: print('Hello,', who)
Hello, World
If the current section raises an exception, you can add the :okexcept: flag
to the current block, otherwise the build will fail.
In [8]: 1/0
[0;31m---------------------------------------------------------------------------[0m
[0;31mZeroDivisionError[0m Traceback (most recent call last)
[0;32m<ipython-input-8-9e1622b385b6>[0m in [0;36m<module>[0;34m[0m
[0;32m----> 1[0;31m [0;36m1[0m[0;34m/[0m[0;36m0[0m[0;34m[0m[0;34m[0m[0m
[0m
[0;31mZeroDivisionError[0m: division by zero
IPython Sphinx directive module
To enable this directive, simply list it in your Sphinx conf.py file
(making sure the directory where you placed it is visible to sphinx, as is
needed for all Sphinx directives). For example, to enable syntax highlighting
and the IPython directive:
extensions = ['IPython.sphinxext.ipython_console_highlighting',
              'IPython.sphinxext.ipython_directive']
The IPython directive outputs code-blocks with the language ‘ipython’. So if you do not have the syntax highlighting extension enabled as well, then all rendered code-blocks will be uncolored. By default this directive assumes that your prompts are unchanged IPython ones, but this can be customized. The configurable options that can be placed in conf.py are:
- ipython_savefig_dir:
- The directory in which to save the figures. This is relative to the
Sphinx source directory. The default is
html_static_path. - ipython_rgxin:
- The compiled regular expression to denote the start of IPython input
lines. The default is
re.compile('In \[(\d+)\]:\s?(.*)\s*'). You shouldn’t need to change this. - ipython_warning_is_error: [default to True]
- Fail the build if something unexpected happen, for example if a block raise
an exception but does not have the
:okexcept:flag. The exact behavior of what is considered strict, may change between the sphinx directive version. - ipython_rgxout:
- The compiled regular expression to denote the start of IPython output
lines. The default is
re.compile('Out\[(\d+)\]:\s?(.*)\s*'). You shouldn’t need to change this. - ipython_promptin:
- The string to represent the IPython input prompt in the generated ReST.
The default is
'In [%d]:'. This expects that the line numbers are used in the prompt. - ipython_promptout:
- The string to represent the IPython prompt in the generated ReST. The
default is
'Out [%d]:'. This expects that the line numbers are used in the prompt. - ipython_mplbackend:
- The string which specifies if the embedded Sphinx shell should import
Matplotlib and set the backend. The value specifies a backend that is
passed to
matplotlib.use()before any lines inipython_execlinesare executed. If not specified in conf.py, then the default value of ‘agg’ is used. To use the IPython directive without matplotlib as a dependency, set the value toNone. It may end up that matplotlib is still imported if the user specifies so inipython_execlinesor makes use of the @savefig pseudo decorator. - ipython_execlines:
- A list of strings to be exec’d in the embedded Sphinx shell. Typical
usage is to make certain packages always available. Set this to an empty
list if you wish to have no imports always available. If specified in
conf.pyasNone, then it has the effect of making no imports available. If omitted from conf.py altogether, then the default value of [‘import numpy as np’, ‘import matplotlib.pyplot as plt’] is used. - ipython_holdcount
- When the @suppress pseudo-decorator is used, the execution count can be
incremented or not. The default behavior is to hold the execution count,
corresponding to a value of
True. Set this toFalseto increment the execution count after each suppressed command.
As an example, to use the IPython directive when matplotlib is not available,
one sets the backend to None:
ipython_mplbackend = None
An example usage of the directive is:
.. ipython::

    In [1]: x = 1

    In [2]: y = x**2

    In [3]: print(y)
See http://matplotlib.org/sampledoc/ipython_directive.html for additional documentation.
Pseudo-Decorators
Note: Only one decorator is supported per input. If more than one decorator is specified, then only the last one is used.
In addition to the Pseudo-Decorators/options described at the above link, several enhancements have been made. The directive will emit a message to the console at build-time if code-execution resulted in an exception or warning. You can suppress these on a per-block basis by specifying the :okexcept: or :okwarning: options:
.. ipython::
    :okexcept:
    :okwarning:

    In [1]: 1/0
    In [2]: # raise warning.
To Do
- Turn the ad-hoc test() function into a real test suite.
- Break up ipython-specific functionality from matplotlib stuff into better separated code.